This post may contain affiliate links. As an Amazon Associate, we may earn commissions from qualifying purchases.
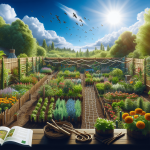
Transitioning to a no-dig garden is an exciting journey that can transform your gardening experience, promoting healthier soil and more abundant crops with less effort. In this article, you’ll discover the essential steps to make this eco-friendly switch, from preparing your garden bed without the backbreaking work of digging, to layering organic materials that enrich your soil naturally. You’ll also learn how to manage weeds and maintain your garden to ensure it flourishes season after season. Get ready to embrace a greener, simpler way to cultivate your plants! Have you ever thought about transitioning to a no-dig garden but felt unsure where to start? You’re not alone! The journey to a no-dig garden can seem overwhelming at first, but with the right steps, it’s completely achievable. In fact, it can be a fun and rewarding project that offers numerous benefits for your plants and soil.
Understanding the No-Dig Gardening Concept
Before diving into the steps, let’s take some time to understand what no-dig gardening actually involves. Essentially, no-dig gardening is a method of growing plants without disturbing the soil through traditional digging methods. By adopting this approach, you can improve soil structure, enhance nutrient availability, and support beneficial soil organisms.
Benefits of No-Dig Gardening
Here are some compelling reasons to consider this gardening method:
- Improved Soil Health: No-dig methods promote healthy soil ecosystems, allowing beneficial microorganisms and earthworms to thrive.
- Reduced Weed Growth: Layers of compost and mulch help suppress weed germination.
- Less Physical Strain: Say goodbye to the back-breaking labor of digging and tilling!
- Enhanced Soil Moisture Retention: Mulching and composting improve water retention, reducing the need for frequent watering.
Step 1: Choosing Your Garden Location
The first step in your no-dig garden journey is selecting an appropriate location. Ideally, this should be a spot that receives ample sunlight and has good drainage.
Assessing Light Conditions
Most vegetables and flowers thrive in a spot that receives at least six hours of sunlight per day. Make sure to observe the chosen area at different times of the day to evaluate sunlight exposure.
Checking Soil Drainage
Test the drainage of your soil by digging a small hole and filling it with water. If the water drains away in less than an hour, the drainage is likely sufficient. If not, you may need to consider raised beds or alternative locations.

Step 2: Preparing the Garden Bed
Now that you have your location sorted, it’s time to prepare your garden bed. This is an essential step, as it sets the stage for your no-dig gardening success.
Suppressing Existing Vegetation
The first step is to suppress any existing grass or weeds. You can do this by laying down cardboard or newspaper over the area. Be sure to overlap the edges to avoid letting light through, which can encourage weed growth.
Adding Layers
After your base layer is in place, you’ll need to add layers of organic material. Think of it like assembling a lasagna!
| Layer | Description |
|---|---|
| First Layer | Brown materials like cardboard or newspaper to suppress weeds. |
| Second Layer | Green materials like grass clippings or kitchen scraps. |
| Third Layer | Compost or well-rotted manure to boost fertility. |
| Top Layer | Mulch such as straw or wood chips to help retain moisture. |
Repeat these layers until you achieve a depth of at least six inches. The layers will break down over time, enriching the soil without the need for digging.
Step 3: Planting Your No-Dig Garden
Once your garden bed is prepared, it’s time for the fun part—planting!
Selecting Plants
Choose plants that are well-suited to your climate and soil type. For beginners, hardy plants like tomatoes, lettuce, and beans are excellent options.
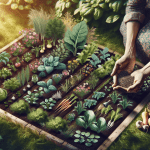
Planting Techniques
When planting, make holes or small trenches just big enough for your plant’s root system. Place the plants in these holes and backfill with compost. Avoid disturbing the soil more than necessary.

Step 4: Maintaining Your No-Dig Garden
Your garden is planted. Now what? Maintenance is crucial to ensuring the long-term success of your no-dig garden.
Watering
Make sure to water your garden consistently, especially during the initial stages when plants are establishing roots. A good rule of thumb is to water deeply but less frequently to encourage strong root growth.
Mulching
Refreshing your mulch layer will help suppress weeds, retain moisture, and add organic matter to the soil. Make sure to top up the mulch periodically.
Composting
Adding compost is key to maintaining soil fertility. Aim to add a thin layer of compost every few months or whenever you plant new crops.
Step 5: Monitoring and Troubleshooting
Every garden faces challenges. Keeping an eye on your garden and addressing issues promptly is vital.
Pest Control
No-dig gardens can still attract pests. Employing natural pest control methods, such as introducing beneficial insects like ladybugs or using neem oil, can help keep harmful pests at bay.
Disease Management
Monitor your plants for signs of disease. If you notice any issues, remove affected plants immediately and dispose of them away from your garden to prevent the spread of disease.
Step 6: Harvesting and Enjoying
Finally, the most rewarding step—harvesting the fruits (and vegetables) of your labor! Harvesting your crops at their peak ensures the best flavor and nutritional value.
Optimal Harvest Times
Each plant has its optimal harvest time. For example, tomatoes should be harvested when fully red and slightly soft, while lettuce can be harvested as soon as the leaves reach a usable size. Refer to planting guides for specific advice on harvesting times for different crops.
Enjoying Your Produce
Whether you’re snacking on fresh cherry tomatoes or crafting a delicious salad, enjoying your home-grown produce is what makes all the effort worthwhile.
Additional Tips for No-Dig Gardening Success
Rotation and Diversity
Practicing crop rotation and planting a diversity of crops can help maintain soil fertility and prevent pest and disease buildup. For example, avoid planting the same crop in the same spot year after year. Instead, rotate crops from different plant families.
Seasonal Gardening
Adapting your garden to the seasons can extend your growing period. Cool-season crops like spinach and kale can be planted in the spring and fall, while warm-season crops like peppers and cucumbers thrive in the summer.
Community and Resources
Don’t hesitate to reach out to local gardening clubs or online communities for advice and support. Many experienced gardeners are more than happy to share their knowledge and experience.
Common Questions About No-Dig Gardening
Does No-Dig Gardening Work for All Soil Types?
No-dig gardening is beneficial for most soil types, but especially for heavy clay or sandy soils that are difficult to work with.
How Long Does It Take for a No-Dig Garden to Establish?
While you can start planting almost immediately, it generally takes a few months for the organic layers to break down fully and enrich the soil.
Can You Transition an Existing Garden to No-Dig?
Absolutely! You can convert an existing garden by following the same steps: suppressing existing vegetation, adding layers of organic material, and then planting.
Conclusion
Transitioning to a no-dig garden is a simple, sustainable, and rewarding way to grow your own food and flowers. By following these steps—choosing the right location, preparing your bed, planting, maintaining, troubleshooting, and harvesting—you’ll be well on your way to a thriving no-dig garden. Happy gardening!