This post may contain affiliate links. As an Amazon Associate, we may earn commissions from qualifying purchases.
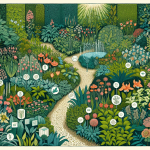
Embarking on the journey of saving seeds from your plants is a delightful way to deepen your gardening experience and ensure a bounty for years to come. This guide is designed to walk you through the most effective strategies for harvesting, drying, and storing seeds, allowing you to preserve the best of your garden’s offerings. From understanding the right moment to collect seeds to maintaining their viability until the next planting season, you’ll find everything you need to turn this year’s garden into the groundwork for future flourishing harvests.

Understanding Seed Saving
Benefits of saving seeds
Saving seeds, you might find, is a rewarding practice that brings numerous benefits. Firstly, it can significantly reduce your gardening costs, as you won’t need to purchase new seeds each growing season. Secondly, by selecting seeds from the healthiest and most productive plants, you progressively improve the quality and resilience of your garden crops. Furthermore, saving seeds allows you to preserve genetic diversity, contributing to the conservation of rare and heirloom varieties that might otherwise disappear.
Types of plants and their seed-saving compatibility
It’s essential to know that not all plants are equally suitable for seed saving. Open-pollinated and heirloom varieties are the best candidates, as they reliably produce seeds that will grow into plants similar to their parent. Hybrid plants (often labeled as F1), however, do not generally produce true-to-type seeds and might lead to disappointing results. When planning your garden with seed saving in mind, focusing on open-pollinated plants will ensure a more rewarding experience.
Annuals, biennials, and perennials explained
To succeed in saving seeds, understanding the lifecycle of your plants is crucial. Annuals complete their entire lifecycle, from germination to seed production, within one year and are often the easiest to save seeds from. Biennials require two years to complete their lifecycle, typically focusing on vegetative growth the first year and producing seeds the second year. Perennials live for more than two years, often not producing seeds until they are fully mature, which can take several seasons. Knowing these distinctions will help you plan your seed-saving activities more effectively.
Identifying Seed Maturity
Signs of seed readiness
Identifying when seeds are ready for harvest is key to successful seed saving. Look for physical indicators such as pods that dry and crack open for beans or peas, or fruits that reach full color and softness, like tomatoes. Seeds should be hard, fully formed, and resemble the seeds of the same plant you’d expect to buy commercially.
Timing for different plant types
The timing of seed maturity varies widely among plants. Annuals tend to set seed at the end of the summer or early fall, while biennials usually need a cold period before flowering and setting seed in their second year. For perennials, the timing of seed maturity can vary significantly based on the species and the local climate, requiring close observation over several seasons.
Importance of harvesting at the right time
Harvesting seeds at the right time ensures they have reached full maturity, optimizing their viability for storage and future plantation. Too early, and the seeds may not germinate; too late, and they might have been damaged by weather or pests.
Harvesting Seeds Properly
Methods for collecting seeds
Collecting seeds varies from shaking dry seeds from a plant into a bag to cutting and fermenting fleshy fruits to remove seeds. The method depends largely on the plant species and the nature of the seed. Lightweight seeds may require a gentle tap or shake, whereas heavier seeds from fruits may need a bit more processing to separate the seeds from the flesh.
Handling seeds during harvest
During harvest, handle seeds gently to avoid any damage. For wet-processed seeds, such as tomatoes, ensure they are fully cleaned and free from pulp before drying. For dry seeds, threshing may be necessary to separate the seed from the chaff.
Minimizing damage and loss
To minimize damage and loss, collect seeds on a dry, sunny day when the dew has evaporated, and use appropriate containers to catch loose seeds. Labeling containers during harvest can also prevent mix-ups and contribute to better organization.
Cleaning and Processing Seeds
Separating seeds from chaff
Separating seeds from chaff is crucial for storage and the future sowing of healthy plants. Techniques can range from winnowing, which involves gently blowing away lightweight chaff from the heavier seeds, to sieving and manual picking.
Wet and dry processing techniques
Wet processing is commonly used for seeds encased in fleshy fruits and involves scooping out the seeds, fermenting them to remove the gelatinous coating, and then thoroughly rinsing and drying. Dry processing suits seeds that mature in pods, capsules, or husks, requiring them to be dried, threshed, and then winnowed.
Tools for efficient seed cleaning
Several tools can make seed cleaning more efficient, including screens of various sizes for sieving, trays for drying, and even simple fans for winnowing. The goal is to have pure seeds, free of plant material and debris.

Drying and Storing Seeds
Correct drying methods
Proper drying is pivotal for the longevity and viability of stored seeds. Seeds should be spread out in a thin layer on a dry surface with plenty of air circulation and kept away from direct sunlight. Depending on humidity levels, drying can take from several days to a couple of weeks.
Moisture content and its impact on seed viability
Seeds stored with too much moisture can mold or rot, while overly dried seeds may lose their germination capacity. The ideal moisture content varies among species but generally hovers around 5-10% for most common vegetable and flower seeds.
Long-term storage solutions
For long-term storage, seeds should be kept in a cool, dark, and dry place. Using airtight containers and including silica gel packets can help maintain low humidity levels. Some seeds can even be stored in the refrigerator or freezer for extended viability.
Labeling and Documentation
Importance of accurate labeling
Accurate labeling is essential for keeping track of your seed inventory. It prevents confusion and helps ensure you plant the right seeds at the right time in future seasons.
Information to include on labels
Labels should include the plant name, variety, and the date of seed collection. Including additional notes on the plant’s performance or special growing requirements can be helpful for future planting decisions.
Keeping records for future growing seasons
Maintaining a seed-saving log or journal can be incredibly beneficial, allowing you to record observations, germination rates, and other insights that can inform your practices and improve your seed-saving success over time.
Testing Seed Viability
Simple germination tests
Conducting a simple germination test involves placing a number of seeds (usually around ten for easy calculation) on a moist paper towel, covering it, and then keeping it in a warm place to observe germination. This test helps estimate the viability rate of your seeds before planting.
Interpreting test results
After a set period, usually 7-14 days depending on the seed type, count how many seeds have germinated. This number gives you the germination rate, allowing you to adjust seeding rates accordingly.
Deciding when to discard seeds
If the germination rate is significantly low, it might be time to discard the seeds and save fresh seeds for future planting. However, remember that even a low germination rate can be acceptable for seeds that are easy and quick to produce in abundance.
Diseases and Pest Management
Identifying common seed-borne diseases
Some diseases can be transmitted through seeds, so it’s important to only save seeds from healthy plants. Look for any signs of disease or abnormality in both parent plants and seeds during collection.
Prevention and treatment options
Preventive measures include rotating crops, avoiding seed collection from diseased plants, and, in some cases, treating seeds with appropriate fungicides. However, the use of chemicals should be minimal and within organic gardening guidelines, when possible.
Safe storage practices to avoid pests
To avoid pests, store seeds in airtight containers and place them in a cool, dry location. Regular checks for signs of pest infestation can also help you take early action to protect your seed stock.
Legality and Ethics of Seed Saving
Understanding plant patents and copyrights
Before saving seeds, it’s vital to be aware of plant patents and Plant Breeder’s Rights (PBR). These laws can restrict the saving and sharing of seeds from certain patented or copyrighted plants, so always check legality if you’re unsure.
The importance of preserving biodiversity
Seed saving is a practice that directly contributes to the preservation of plant biodiversity, offering resilience against climate change and disease. By saving seeds, especially rare or heirloom varieties, you’re playing a part in safeguarding our agricultural heritage.
Legal considerations for sharing and selling saved seeds
If you plan to share or sell your saved seeds, familiarize yourself with local regulations to ensure compliance. While sharing seeds within a community garden or among friends is generally acceptable, commercial selling might require adherence to specific labeling and testing requirements.
Advanced Techniques and Considerations
Cross-pollination and maintaining purity in seed stocks
If you’re interested in maintaining varietal purity, understanding how to prevent cross-pollination is essential. Techniques can involve distance isolation, temporal isolation (planting times), or physical barriers like netting or bags to cover flowers.
Heirloom vs. hybrid seeds
Heirloom seeds come from plants that have been passed down through generations, known for their flavor, productivity, or adaptability to local conditions. Hybrid seeds are the result of cross-breeding specific parent plants to produce desired traits. While hybrids can offer benefits like disease resistance, they don’t usually produce true-to-type seeds.
Creating your own seed bank
Creating a seed bank involves carefully selecting, saving, and storing seeds from your garden each year. This practice not only ensures you have a personal supply of seeds for future gardens but also contributes to food security and biodiversity conservation within your community. Over time, you can develop a diverse collection that is well-adapted to your local environment.