This post may contain affiliate links. As an Amazon Associate, we may earn commissions from qualifying purchases.
Have you ever considered turning your kitchen scraps into rich, organic compost through worm composting, also known as vermiculture? Building a successful worm composting system can be a rewarding way to recycle your waste and create a nutrient-rich soil amendment for your garden. Whether you are new to composting or looking to refine your techniques, understanding the steps to establish a thriving worm composting setup is essential.
In this guide, you’ll learn everything from selecting the right type of worms to maintaining the environment they need to flourish. Let’s explore each step you’ll need to take on this path to sustainable gardening.

Understanding Worm Composting
What is Worm Composting?
Worm composting, or vermiculture, is the process of using worms to decompose organic waste into compost. This method of composting is efficient and can be done indoors, making it accessible for those with limited outdoor space. By providing a habitat for worms, you enable them to naturally break down material into a rich, earthy substrate known as castings or vermicompost, which serves as an excellent fertilizer.
Benefits of Worm Composting
There are numerous benefits to adopting worm composting. Not only does it reduce the amount of waste sent to landfills, but it also provides high-quality compost for garden use. Worm composting can be done all year round and typically produces results more quickly than traditional composting methods. Additionally, vermicompost enhances soil structure and promotes plant growth due to its nutrient-rich profile.
Getting Started with Worm Composting
Picking the Right Worms
The first step in setting up your worm composting system involves selecting the right worms. Not all worms are suitable for composting, as some types thrive in different conditions. The most common choice is Eisenia fetida, also known as red wigglers. These worms are highly effective in confined spaces and consume a considerable amount of organic matter relative to their size.
Comparison of Worm Types:
| Worm Type | Characteristics | Suitability for Vermiculture |
|---|---|---|
| Red Wigglers | Small, redworms, efficient | Highly suitable |
| European Nightcrawlers | Larger, more temperature resilient | Suitable |
| Tiger Worms | Similar to red wigglers | Suitable |
| Earthworms | Deep-burrowers, large | Not ideal for vermiculture |
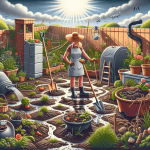
Choosing a Bin
Your worms will need a comfortable home, preferably a container or bin that is breathable and allows for good air circulation. The size of the bin will depend on how much waste you plan to compost, but a general rule of thumb is that 1 pound of worms can process half a pound of waste per day.
When selecting a bin, consider the material. Plastic bins are commonly used due to their lightweight nature and affordability. Wooden bins are another option; they are breathable but can decompose over time. You should also think about whether you want a homemade or commercially-produced system, with the latter often offering more convenience and features like drainage systems.
Preparing the Bin
Preparation is key to ensuring your worm bin provides the optimal environment for worm activity. Start by lining the bottom of the bin with bedding material such as shredded paper, cardboard, peat moss, or coconut coir. This layer acts like soil, keeping the worms insulated and providing a surface to burrow.
It’s vital that the bedding is moistened lightly, akin to the dampness of a wrung-out sponge, as worms breathe through their skin and require moisture to survive. Thus, the moisture level is essential for the health of your worms.
Adding Worms and Waste
Introducing Worms to Their New Home
Once you’ve prepared the bin with proper bedding, it’s time to introduce your worms. Gently place them on top of the bedding, letting them naturally burrow down and acclimate to their new environment. This process helps decrease their stress, encouraging them to start feeding and reproducing more quickly.
Understanding What to Feed Your Worms
Feeding your worms the right type of waste is crucial for a healthy composting system. They consume small particles of organic waste, converting it into nutrient-rich compost. Suitable food scraps include fruit and vegetable peels, coffee grounds, tea leaves, and finely crushed eggshells.
Avoid feeding them large quantities of citrus peels, spicy foods, dairy products, or meat, which can alter the pH and attract pests or cause foul odors. Aim for variety, ensuring a balanced diet that maintains the worms’ efficiency in breaking down material.
Maintaining Your Worm Composting System
Monitoring Moisture and Temperature
Temperature and moisture are two critical factors in maintaining a successful worm composting system. Ideally, worms thrive in temperatures ranging from 55°F to 77°F (13°C to 25°C). Bin location is vital—for cold conditions, ensure your bin receives warmth, and for excessive heat, place it in shaded areas.
Moisture should mirror that of a damp sponge; too dry, and your worms could dehydrate, but too wet, and they may struggle to breathe or drown. Be observant, and adjust accordingly by spraying water or adding dry bedding when necessary.
Turning and Ventilating the Bin
Regularly turning the compost within the bin encourages decomposition and avoids compaction, providing more oxygen to your worms. Gently use a small garden trowel or gloved hand to stir and aerate the contents every few weeks.
Dealing with Pests and Odors
One of the potential challenges of vermiculture is dealing with pests or odors. To minimize these issues, ensure food is buried under bedding and avoid overfeeding. Fruit flies are common, and covering waste with additional bedding can significantly reduce their presence.
If you encounter odors, it might indicate an imbalance, such as excess moisture or incorrect food balance. Adjust conditions by adding dry material or improving ventilation to restore harmony.

Harvesting and Using Vermicompost
When to Harvest Vermicompost
Over time, you’ll notice that the bedding and waste transform into dark, crumbly vermicompost. This compost is typically ready for harvest within three to six months, depending on factors like bin size, worm population, and feedstock.
Methods for Harvesting Compost
Several methods can be used to separate the compost from the worms. One approach is to push all material to one side of the bin, adding fresh bedding to the empty side. Gradually the worms will migrate to the newly available food source, allowing you to remove finished compost easily.
Alternatively, you can empty the bin onto a large sheet of plastic and create small piles, letting the worms burrow away from surface light. Collect the vermicompost from the top over a period of hours.
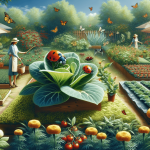
Applying Vermicompost to Your Garden
Once you’ve collected the vermicompost, it’s ready for garden use. This compost can be incorporated directly into the soil or used as a side dressing for plants, enhancing soil microbial life and fertility. With its rich micronutrient profile, a little goes a long way.
Troubleshooting Common Worm Composting Problems
Worms Trying to Escape
If you notice worms climbing out of the bin, it’s likely an indicator that something is amiss. Check the moisture, temperature, and pH levels to ensure conditions are optimal. Worms can sense changes and unfavorable conditions, prompting them to seek escape.
Slow Decomposition
Sometimes, decomposition seems slow despite regular feeding. This issue might arise from inefficient worm numbers or bin conditions. Making slight adjustments, such as checking if the moisture is sufficient or reducing the feed quantity, can encourage proper decomposition.
Excessive Beddings
At times, it may seem as though bedding materials remain mostly undigested. Verify that you’re adding sufficient amounts of waste, as well-balanced feeding is crucial to aiding the worms’ digestion and bedding consumption.
Advancing Your Worm Composting Skills
Scaling Up Your Operation
If you find vermiculture fulfilling, you might consider expanding your efforts. Larger bins or multiple containers can accommodate increased waste, resulting in increased compost yield. Once mastered, worm composting can be scaled to meet greater gardening or farming needs.
Exploring Vermiculture Communities and Resources
Joining a community of enthusiasts allows you to share experiences and glean insights from others. With social media groups, online forums, and local workshops, the possibilities to advance your skills and knowledge are abundant.
Networking with fellow vermiculturists can also highlight innovative techniques and ideas for system efficiency, ensuring your composting journey remains successful and enriching.
In the voyage of worm composting, each step taken transforms waste into lush compost, fortifying both garden and gardener. With these insights and guidelines, creating a successful worm composting system becomes not just achievable, but an endeavor replete with rewards. What advancements might you discover in your composting journey?