This post may contain affiliate links. As an Amazon Associate, we may earn commissions from qualifying purchases.
Looking to make watering your garden more efficient? In “How Do I Set Up A Drip Irrigation System For My Garden?”, you’ll discover a straightforward guide to transforming your gardening routine. This insightful article will walk you through selecting the right components, laying out your system, and fine-tuning it to ensure your plants receive just the right amount of water. By the end, you’ll have all the knowledge you need to create a sustainable and effective irrigation system that will keep your garden thriving with minimal effort. Have you ever looked at your garden and wondered, “How do I set up a drip irrigation system for my garden?” You’re not alone. Many gardeners find themselves juggling hoses, sprinklers, and—God forbid—a watering can, only to end up with unevenly watered plants and muddy shoes.
Well, fret not, my horticultural friend. By the end of this article, you’ll know exactly how to convert your water-distribution chaos into a streamlined and efficient drip irrigation system.
What is Drip Irrigation?
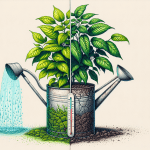
Picture this: tiny droplets of water dribbling directly onto the roots of your plants, like little nurturing pearls. That’s essentially what drip irrigation is—a means to water your plants directly and efficiently.
Drip irrigation saves water and time. It minimizes evaporation and delivers water precisely where it’s needed. No more soggy feet for you, just happy, hydrated plants.
Why Choose Drip Irrigation?
Why not just stick with the traditional methods, you ask? Well, there are solid reasons for upgrading your gardening game.
- Water Efficiency: The system uses up to 50% less water.
- Healthier Plants: Direct water application focuses on root zones.
- Reduced Weed Growth: Less water on the surface means fewer weeds.
- Time-Saving: Automation possibilities free up your time.

Planning Your Drip Irrigation System
Before heading to Home Depot and going wild in the irrigation aisle, you need to lay the groundwork, literally and figuratively.
Assess Your Garden’s Needs
Not all plants are created equal. Some like a steady drink; others prefer a more restrained sip. Take inventory of what you’re growing and where it’s located. Different plants may require different amounts of water, and your layout needs to reflect that.
| Plant Type | Water Requirement | Location |
|---|---|---|
| Tomatoes | High | Sunny area |
| Lavender | Low | Border |
| Basil | Medium | Herb bed |
Measure Your Garden Area
Grab that measuring tape, or better yet, a long piece of twine. Get the dimensions of your garden. You’ll need to know the sizes to create a layout plan.
Plan Your Layout
Sketch a rough diagram of your garden. Mark out where each plant type is located and how many zones you’ll need. Zones are basically different sections of your garden that may need varied watering schedules.
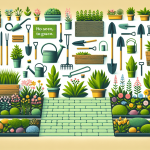
Choosing the Right Components
Alright, it’s time to get familiar with the bits and bobs you’ll need for this project.
Main Line
This is the backbone of your system. It will usually be a 1/2 inch or 3/4 inch poly tubing.
Emitters
These little gems control the flow of water to your plants. They come in different flow rates, typically between 1 to 4 gallons per hour (GPH).
T-connectors and Elbows
Plastic connectors help you navigate tricky turns. T-connectors are perfect for branching lines, and elbows are handy for right-angle turns.
Pressure Regulator
If you don’t want your system to burst apart like a confetti cannon, a pressure regulator is essential. It keeps the water pressure in a manageable range.
Filter
Even if your water looks clean, tiny particles can clog your emitters. A filter will safeguard your system.
| Component | Purpose |
|---|---|
| Main Line | Distributes water to the entire system |
| Emitters | Control the amount of water to each plant |
| T-connectors/Elbows | Shape your tubing layout |
| Pressure Regulator | Maintains suitable water pressure |
| Filter | Prevents clogging from debris |

Setting Up Your Drip Irrigation System
Ready to get your hands dirty? Let’s dive in and set this up.
Step 1: Laying the Main Line
Start with laying down your main line. Make sure it snakes through all the zones in your garden. Secure it loosely with garden stakes since you’ll tweak the positioning later.
Step 2: Installing the Filter and Pressure Regulator
Attach your filter to your water source. Next, screw the pressure regulator onto the filter. Trust me, you don’t want a flailing hose spewing water like an open fire hydrant.
Step 3: Attaching the Main Line to Water Source
Connect the mainline tubing to the pressure regulator. You might need a connector for this, depending on your setup.
Step 4: Branching Out with T-connectors and Elbows
Use T-connectors and elbows to branch out sections of your main line to reach different zones. This is where your sketch and measurements will be invaluable.
Step 5: Adding Emitters
Punch holes in your mainline tubing where each plant or group of plants will be. Stick the emitters into these holes. Make sure to check their flow rates correspond with the water needs of each plant.
Step 6: Testing the System
Before you bury the tubing under mulch, turn on the water. Check every emitter to ensure it’s working. Adjust as needed and make sure there are no leaks.
Step 7: Covering Up
Once you’re satisfied that everything is in working order, secure the mainline and secondary lines with stakes. Cover them with mulch to keep them protected and make your garden look neat.
Maintenance Tips
Just because you’ve set it up doesn’t mean you’re done. Regular maintenance ensures your system runs smoothly.
Check for Leaks
Once a month, walk along your tubing and check for any signs of leaks or damaged emitters. It’s easier to fix a small problem before it becomes a big headache.
Clean the Filter
A clogged filter can reduce the efficiency of the entire system. Clean it regularly according to the manufacturer’s guidelines.
Winterizing Your System
If you live in a place where temperatures drop below freezing, you’ll need to winterize your system. Drain the water to prevent cracking and remove any vulnerable parts like the pressure regulator and filter.
Troubleshooting Common Issues
Every rose has its thorn, and every drip irrigation system has its quirks. Here’s how to keep yours in tip-top shape.
Uneven Watering
If some plants are getting more water than others, it could be that your emitters aren’t matched to the plants’ water needs. Double-check and swap out as necessary.
Low Pressure
If water barely trickles out, your pressure regulator may need adjusting, or you’re dealing with a clog somewhere in the main line or emitters.
System Not Turning On
If your system is automated and it’s not turning on, check the timer and power source. Sometimes, it’s as simple as a dead battery.
Automation: The Garden of the Future
Wouldn’t it be great if your garden could practically water itself? Automating your drip irrigation system can get you one step closer to that dream.
Timers
Install a timer to start and stop watering at the best times of day, typically early morning or evening when evaporation is minimal.
Moisture Sensors
More advanced systems use moisture sensors to determine when your plants need water, making sure your garden never goes thirsty or drowns.
Cost and Benefits
Now, you might be wondering: is all this worth it? Let’s break it down.
Initial Cost
Setting up a drip irrigation system isn’t cheap. Components can add up, especially if you’re going for a more automated setup. A basic system can start around $50, but more complex ones can range into the hundreds of dollars.
Long-Term Savings
Where you really win is in water savings. With water becoming an increasingly precious resource, a drip system can cut your usage by half. Additionally, automation saves you time and stress, meaning you get to enjoy your garden rather than being a slave to it.
Healthier Plants
Healthier plants mean a more productive garden. You’ll see better yields, more vibrant flowers, and fewer weeds, contributing to a happier, greener space.
Conclusion
Setting up a drip irrigation system for your garden may seem like an enormous task, but breaking it down into manageable steps makes it totally feasible. You’ll be the master of your garden oasis, efficiently watering plants and taking a well-deserved rest, all while your garden thrives.
Now, what are you waiting for? Grab that measuring tape and start planning. May your garden be ever green and your watering ever efficient.