This post may contain affiliate links. As an Amazon Associate, we may earn commissions from qualifying purchases.
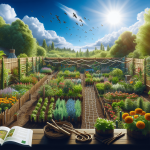
Embarking on the journey of creating a garden from scratch in your backyard can be both an exciting and rewarding endeavor. It’s all about transforming that blank canvas of outdoor space into a flourishing oasis filled with vibrant flowers, lush greenery, or even a bounty of fruits and vegetables, depending on your preferences. This article will walk you through the essential steps to kick-start your gardening project, from planning and soil preparation to selecting the right plants and maintaining your newfound green sanctuary. Whether you’re a seasoned green thumb or a budding gardener, these insights will equip you with the knowledge to bring your dream garden to life, one seedling at a time. Starting a garden from scratch in your backyard can seem like a daunting task, but with a bit of planning and effort, you can transform your outdoor space into a flourishing oasis. Let’s walk through the steps together in a friendly and accessible manner.

Assessing Your Space
Before diving into any gardening project, it’s essential to take stock of the space you have available. This initial assessment will guide every decision you make moving forward.
Understanding your yard’s dimensions
Grab a tape measure and jot down the length and width of your yard. Knowing the exact dimensions will help you realistically plan how much garden you can accommodate. Remember, you don’t want to overcommit and end up overwhelmed.
Checking sunlight exposure
Observe how sunlight plays across your yard throughout the day. Most vegetables, fruits, and flowers require at least six to eight hours of direct sunlight. So, identify the sunniest spots for your garden beds.
Identifying soil type
Squeeze a handful of moist soil from your yard. If it falls apart easily, you likely have sandy soil; if it sticks together tightly, you have clay. Knowing your soil type is crucial for choosing plants and amending the soil to suit their needs.
Considering accessibility and visibility
Think about how you’ll access your garden for watering, weeding, and harvesting. Also, consider visibility. Placing your garden in a spot where you can see and enjoy it from your window or patio will bring added pleasure.
Planning Your Garden Layout
With an understanding of your space, it’s time to plan the layout of your garden. This step transforms your vision into a tangible plan.
Choosing between in-ground and raised beds
Consider the pros and cons of in-ground versus raised beds. Raised beds can offer better drainage and easier access but require more initial investment for materials.
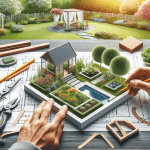
Creating a garden design and layout plan
Sketch a simple diagram of your garden area, keeping in mind the size and shape of your available space. This plan will serve as a roadmap for your garden layout.
Deciding on the size of your garden
Keep it manageable. A smaller garden that you can comfortably maintain is better than a large one that becomes overwhelming. Start small; you can always expand later.
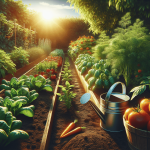
Incorporating paths and walkways
Include paths and walkways in your plan to ensure easy access to all parts of your garden without stepping on and compacting the soil.
Selecting What to Plant
Choosing what to plant is one of the most enjoyable parts of garden planning. But, your decisions should be guided by practical considerations.
Considering your climate zone
Identify your climate zone to find out which plants will thrive in your area. This information narrows down your choices to suitable vegetables, fruits, flowers, or herbs.
Choosing between vegetables, fruits, flowers, or herbs
Decide whether you want to grow vegetables for food, flowers for beauty, herbs for cooking, or a mix of these. Each type of plant has different care requirements.
Researching plant compatibility and spacing
Some plants grow well together, while others do not. Research companion planting to maximize your garden’s health and yield. Also, note the spacing requirements for each plant to avoid overcrowding.
Deciding on seeds versus starter plants
Consider whether to start your garden from seeds or buy starter plants. Seeds are more cost-effective but require more time and effort. Starter plants can give you a head start on the growing season.
Gathering Your Tools and Supplies
Now that your garden is planned, it’s time to gather the tools and supplies you’ll need to bring it to life.
Basic gardening tools needed
Start with basic tools: a trowel, shovel, gardening gloves, a watering can or hose, and pruning shears. These tools will handle most of your garden tasks.
Soil amendments and fertilizers
Based on your soil type, you may need to amend it with compost, manure, or other organic matter to improve fertility and texture. Choose a fertilizer that matches the needs of your plants.
Choosing containers for raised beds
If you’ve opted for raised beds, select containers or build wooden frames. Ensure they’re deep enough to accommodate the root systems of your chosen plants.
Watering equipment essentials
Invest in quality watering equipment. A watering can might suffice for a small garden, while a larger space might need a hose with a spray nozzle or even a drip irrigation system.

Preparing the Garden Bed
It’s time to get your hands dirty and set the stage for planting.
Clearing the area of weeds and debris
Remove all weeds, rocks, and debris from your planting area. This step ensures that your plants will have unobstructed growth.
Amending and fertilizing the soil
Based on your soil type and the needs of your chosen plants, incorporate the necessary amendments to enrich the soil.
Setting up raised beds if chosen
If you’re using raised beds, now is the time to put them in place. Fill them with a mix of topsoil, compost, and other amendments as needed.
Laying out the plants or seeds according to the plan
Refer back to your garden layout plan and start laying out where each plant or seed will go. This step helps you visualize the garden before you start planting.
Planting Your Garden
With the groundwork laid, you’re ready to plant your garden.
Sowing seeds or transplanting starters
If using seeds, follow the packet instructions for sowing depth and spacing. For starter plants, carefully remove them from their containers and plant them at the recommended spacing.
Spacing guidelines for common plants
Research the specific spacing guidelines for your chosen plants. Proper spacing prevents competition for sunlight, water, and nutrients.
The best time of day to plant
Plant either in the early morning or late afternoon to avoid the heat of the day, which can stress plants.
Watering your new plants
After planting, give your garden a gentle but thorough watering. This step helps settle the soil around the roots.
Setting Up Irrigation
Consistent watering is key to a successful garden. Let’s look at how to set up an efficient irrigation system.
Choosing an irrigation system
Decide between a simple watering can, a garden hose, a soaker hose, or a drip irrigation system. Drip irrigation is efficient but requires more setup.
Installing a drip irrigation system
If you choose a drip system, lay out the drip lines to run alongside your plants. Connect these to a water source and set up a timer for automatic watering if desired.
Scheduling watering for optimal growth
Water early in the morning to allow moisture to seep deep into the soil and reduce evaporation. Adjust your watering schedule based on rainfall, temperature, and soil moisture level.
Mulching to retain soil moisture
Apply a layer of mulch around your plants. Mulch helps retain soil moisture, regulate soil temperature, and reduce weed growth.
Mulching and Weed Control
A healthy garden requires ongoing maintenance to keep it weed-free and well-mulched.
Types of mulch to use
Choose an organic mulch like straw, wood chips, or shredded leaves. These materials add nutrients to the soil as they decompose.
Applying mulch around plants
Spread a 2-3 inch layer of mulch around your plants, being careful not to cover the plant bases, which could cause rot.
Methods for natural weed control
Pull weeds by hand or use a hoe to disrupt them. Applying a thick layer of mulch also helps suppress weed growth.
Regular maintenance to prevent weeds
Stay on top of weeding by regularly inspecting your garden and removing weeds before they can establish.
Garden Care and Maintenance
To keep your garden thriving, establish a routine that includes watering, trimming, and fertilizing.
Regular watering schedules
Adhere to a consistent watering schedule, adjusting as necessary for weather conditions. Overwatering can be as harmful as underwatering.
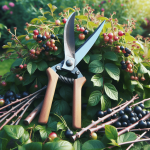
Trimming and pruning basics
Trim and prune your plants to encourage healthy growth. Remove dead or diseased leaves and branches to prevent the spread of infection.
Identifying and managing pests organically
Monitor for garden pests and use organic controls, like neem oil or insecticidal soap, to manage infestations without harming beneficial insects.
Fertilizing throughout the season
Apply fertilizer according to the needs of your plants, usually every four to six weeks. Organic options like fish emulsion or compost tea are beneficial and sustainable choices.
Winterizing Your Garden
As the growing season ends, prepare your garden for winter to ensure it bounces back beautifully next year.
Preparing plants for the colder months
Remove annuals and trim back perennials as recommended for your climate. Clean up fallen leaves and debris to reduce hiding spots for pests.
Protecting perennials and bulbs
Mulch perennials and bulbs to protect them from freezing temperatures. Consider wrapping delicate shrubs in burlap for added protection.
Cover crops and soil protection
Planting cover crops, like clover or rye, can protect and enrich your soil over the winter. These crops also prevent erosion and weed takeover.
Equipment and tool maintenance
Clean and maintain your gardening tools and equipment before storing them for the winter. This care ensures they’re ready for use when spring arrives.
Starting a garden from scratch in your backyard requires effort, but it’s incredibly rewarding. Follow these steps, and you’ll soon be enjoying the fruits (and vegetables and flowers) of your labor. Happy gardening!